Saturday, December 5, 2015

IntelliJ IDEA Application Server Integration

This is a short tutorial on integrating application servers with IntelliJ IDEA 15. Tomat is used as the application server in this tutorial.

One needs to do the following thing to use IntelliJ IDEA with an application server (e.g. Tomcat, JBoss, WebLogic, etc.)

1. Developing the applications
2. Defining an application server in IntelliJ IDEA
3. Creating a server run/debug configuration
4. Running or debugging the server
5. More development, i.e. adding code, changing code.
6. Updating the server with the changes.


Defining an application server in IntelliJ IDEA

It means to create an application server definition specifying an application server installed on the workstation. Basically it tells IntelliJ IDEA what application server (e.g. Tomcat, WebLogic), which version, installation home directory, etc.


(To start the Settings dialog, press Ctrl-Alt-S)

(search the embedded Help with "Defining application servers in IntelliJ IDEA" for more information.)


Creating a Server Run/Debug Configuration

It is similar to create a stand-alone Java program run/debug configuration. Basically such a configuration contains information about the following things:

1. the application server (as defined in "Defining an application in IntelliJ IDEA")
2. ports for the server to listen on
3. applications to be deployed to the server
4. context root of each of the applications
5. scripts to start and shutdown the server


(To access the Run/Debug Configurations dialog, click the IDE menu Run | Edit Configuration ...)

(Search the embedded Help with "Working with Server Run/Debug Configurations" for more information.)


Running or debugging the server


Updating the server with the changes

Make sure on the Server tab of the Run/Debug Configurations dialog, Update classes and resources is selected for On 'Update' action. After code changes have been made, click the Update button on the Run tool window to update the server with the changes.


Sunday, March 29, 2015

AmbiguousTableNameException and NoPrimaryKeyException from DBUnit

Recently I wrote some JUnit tests with DBUnit. The first problem encountered was the exception:

org.dbunit.database.AmbiguousTableNameException: INFOCODE.

 Looking into the DBUnit source code, I figured out that actually INFOCODE is a table name in my database and DBUnit thought that there were more than one tables with that same name. (The database is large and I am not familiar with all tables. So my first though was that INFOCODE is a code used by DBUnit to tell something. It is worth of pointing out that my unit tests and the code to be tested never access the INFOCODE table.) If the exception were named DuplicatedTableNameException, it would help more to figure out the problem sooner. Then it came up to me that my database has multiple schemata and some of them have a table with identical name. Searching DBUnit documentation yielded a solution: passing the desired schema name as an argument to the DatabaseConnection constructor.

 IDatabaseConnection connection = new DatabaseConnection(sqlConnection,  schemaName); 

 where sqlConnection is a javas.sql.Connection, and schemaName is the name of the desired schema. (IDatabaseConnection is DBUnit's database connection interface)

The second problem was the exception:

org.dbunit.dataset.NoPrimaryKeyException: ACCOUNT

ACCOUNT is the name of a table that my code accesses. My database is an old one and no primary key is defined for that table. The DBUnit document does address this problem. The solution, however, is partly incorrect and lacks necessary details. Looking into the DBUnit source code helped to find the right solution:

DefaultColumnFilter columnFilter = new DefaultColumnFilter();
columnFilter.includeColumn("accountId"); // telling DBUnit to treat the named column as primary key
connection.getConfig().setProperty(DatabaseConfig.PROPERTY_PRIMARY_KEY_FILTER,  columnFilter);
where connection is a DBUnit IDatabaseConnection.

By the way, the JUnit tests do not have to extend any DBUnit class or to implement any DBUnit interface. Data can be inserted into, deleted from, and read from database using statements like:
DatabaseOperation.INSERT.execute(connection, dataSet); 
DatabaseOperation.DELETE.execute(connection, dataSet);
ITable accountTable = connection.createQueryTable("account table", "SELECT * FROM account WHERE accountId = 'myAccountId'");
where dataSet is DBUnit IDataSet.

The appendix below gives sample code to construct IDataSet from data in xml files.

Appendix – Load Data from xml Files on Classpath
public static IDataSet importData(String path) {
    InputStream iStream = instance.getClass().getClassLoader().getResourceAsStream(path);
 
    if (iStream == null) {
        throw new RuntimeException("In valid file path: " + path + ". The path must be on classpath.");
    }
 
    InputSource inputSource = new InputSource(iStream);
    FlatXmlProducer flatXmlProducer = new FlatXmlProducer(inputSource);
    IDataSet dataSet = null;
 
    try {
        dataSet = new FlatXmlDataSet(flatXmlProducer);
    } catch(DataSetException e) {
        throw new RuntimeException("In valid data in file: " + path + ".");
    }
    
 return dataSet;
}

Wednesday, March 4, 2015

Migrating a User Domain from WebLogic Server 11g to 12c


I had been running WebLogic Server 11g (i.e. 10.3.6) as a development server for a while. Recently I decided to upgrade to WebLogic Server 12c (i.e.12.1.2). The installation was easy. I however had a user domain with a couple of dozen services (e.g. data sources). It is quite tedious to manually recreate them in a newly created domain.

At first I just tried to copy the whole domain directory in WebLogic Server 11g to WebLogic Server 12c. It does not work. Then I tried to create a domain template from my WebLogic Server 11g and create a new domain in WebLogic Server 12c using that domain template. It does not work either. It turned out that domain templates from WebLogic Servers of different versions are not compatible. The way to make the “domain upgrade” is to use the WebLogic WLST tool. In short, I “exported” the server configuration from my WebLogic Server 11g, and “imported” it into my WebLogic Server 12c. The detail follows.

All examples in this article are pertinent for Windows under the following assumptions:
  • The home directory of the existing domain for WebLogic Server 11g is “C:\wl11gdomains\mydomain
  • The home directory of the new domain for WebLogic Server 12c is “C:\wl12cdomains\mydomain
  • Environment variable WL_HOME denotes the home directory of WebLogic Server 11g
  • Environment variable MW_HOME denotes the home directory of WebLogic Server 12c

“Export” Server Configuration Using WLST


Open a command window, run command:
%WL_HOME%\common\bin\wlst.cmd

It starts WLST, with prompt:
wls:/offline>

In the WLST shell, run command:
configToScript(‘C:/wl11gdomains/mydomain’,  'C:/wlconfig/config.py',  'true', 'C:/wlconfig/config.properties', 'false')

It will create 4 files under C:\wlconfig
  1. config.py  
  2. config.properties
  3. c2sConfigemdevdomain
  4. c2sSecretemdevdomain


In order to import the configuration into WebLogic 12c, we need to overwrite part of the generated config.properties file (assuming the default weblogic username and password are “weblogic” and “password”):
  1. Replace “userName=” with “userName=weblogic”
  2. Replace “userName=” with “userName=weblogic”
  3. Replace “passWord=” with “passWord=password”
  4. Replace “domainDir=WLSTConfigToScriptDomain” with “domainDir=mydomain” 


If you want, you can also change the following properties:

  • adminServerName
  • domName


Install WebLogic Server 12c

Donwload the installation zip file, unzip it. The home directory will be referred to as %MW_HOME%
If not yet, install JDK 7, and set environment variable JAVA_HOME to the home of JDK 7. (WebLogic 12c required Java 7). Also set environment variable MW_HOME to the home of WebLogic 12c.

Open a command window. In the %MW_HOME%, run command:
configure.cmd

The installation is done.

Create New WebLogic Server 12c Domain

Open a command window. cd into C:\wl12cdomains. Run command:
%MW_HOME%\wlserver\server\bin\setWLSEnv.cmd

Then run command:
%MW_HOME%\oracle_common\common\bin\config.cmd

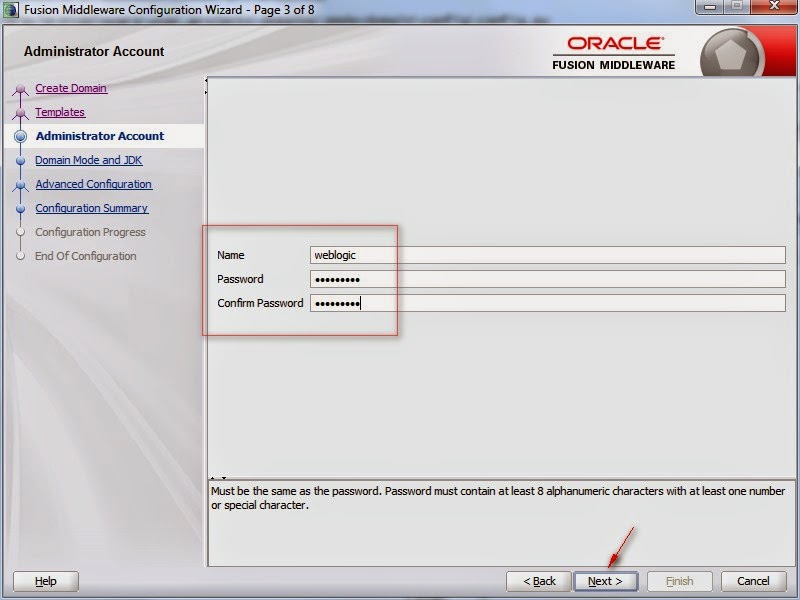
It starts the Configuration Wizard. Use the Configuration Wizard to create a new domain and server with exactly the same name for the domain (and server) as the existing ones.
The domain is created.

At this point, you may want to add some third-party jar files (eg. JDBC drivers) to C:\wl12cdomains\mydomain\lib. You may also want to modify C:\wl12cdomains\mydomain\bin\setDomainEnv.cmd and C:\wl12cdomains\mydomain\bin\startWebLogic.cmd to set various Java options (e.g. debug port)

 “Import” Server Configuration Using WLST

Start the server with this domain. (It is optional, but better)
Open a command window. cd into directory C:\wl12cdomains. Run command:
%MW_HOME%\wlserver\server\bin\setWLSEnv.cmd

Then run command:
%MW_HOME%\oracle_common\common\bin\wlst.cmd

It starts WLST, with prompt:
wls:/offline>

In the WLST shell, run command:
execfile('C:/wlconfig/config.py')

It will configure the new domain with all configuration of the old domain.


Appendix - Use Configuration Wizard to Create a New Domain